Chủ Nhật, 23 tháng 10, 2011

Rabbit Hair accessories for kids:

Rabbit Hair accessories for kids: 
Step 1: get a brooch pin
Step 2: detach elastic band (it was stuck on surprisingly well)
Step 3: Glue the brooch pin to the back (I used a glue gun - I LOVE glue guns)
Step 4: TA DA!!
 Source: http://bee-inspired.blogspot.com/2011/08/revamping-accessories.html

Thứ Năm, 20 tháng 10, 2011

Handmade gift bag

JRB CFBH gift bag 14 finished

Top Note Gift Bag Tutorial

 Paper crafts
JRB CFBH gift bag 1  

You need  1 piece of  6 X 11.5 DSP.  I had originally tried 6 X 12, but the Die did not cover the edges then.  I am using one from the Sending Love collection.  That way, the inside of the bag is decorated, and the outside is all SPARKLY and PURTY!
You also need a Top Note die, though I am using 2.  I cut the blush blossom one on the stitching, so that I could mat them together.
You will also need a scoring tool, scissors, and sticky strip.  The embellishments are up to you, but I'll show you at the end how I finished mine up.
JRB CFBH gift bag 2JRB CFBH gift bag 3
Starting with the 11.5 inch side across the top of your scoring tool (please remove your cutting blade!), you need to score at these intervals - 1  1/8,   2  1/4,   5  1/2,  6  5/8,  7  3/4,  11.  Then, placing your 6 inch side across the top, score at 1 1/2.  Fold on all score lines.
JRB CFBH gift bag 4JRB CFBH gift bag 5
On the bottom, you need to cut out the far corner on the score lines.  Then you need to cut the score lines so you will be left with two wide panels and 2 narrow panels.  The two narrow ones will have a score line running through them, but do not cut them.  Click on the picture to see it better.  You need to get a ruler and lay it on each one of the uncut score lines marking it at 2 1/2 inches.
JRB CFBH gift bag 6JRB CFBH gift bag 7
OK, so now you need to lay that ruler on the mark and the corner of the bottom score line, and score it on the angle.  Click on the second picture fora good look at what it should end up like.  Do this on both narrower panels.  Fold them into what will be the inside of your box.
JRB CFBH gift bag 7.5JRB CFBH gift bag 8
Put a length of sticky strip on the narrow piece at the end, right along the score line.  Then remove the liner and fold the DSP around to make the box.
JRB CFBH gift bag 9JRB CFBH gift bag 10
Fold the two narrower flaps in, and using another piece of sticky strip, adhere the two final flaps together to complete the box portion.  Now, to create the flap.  If you are using two pieces, glue them together and then score it right in front of center.
JRB CFBH gift bag 11JRB CFBH gift bag 12
Add a couple pieces of sticky strip to the back of the top note, making sure to have it on the side that is after the center line. Then stick it to the back of the bag, keeping the score line a smidgen above the top, so it is easier to fold over.
JRB CFBH gift bag 14 finished

Thứ Tư, 19 tháng 10, 2011

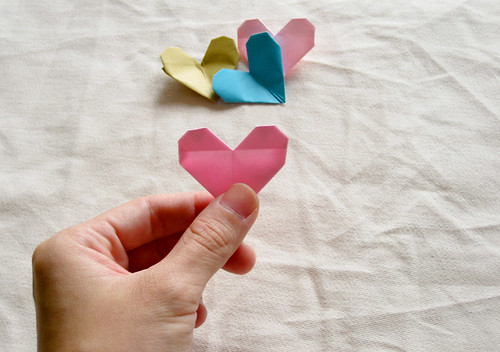
Very easy Origami Heart Tutorial


banner 
Lots of pictures to follow and very easy to make. The tutorial continues behind the cut/link under the picture to save your computer from loading all the images in case you don’t care to do heart origami!
  
24


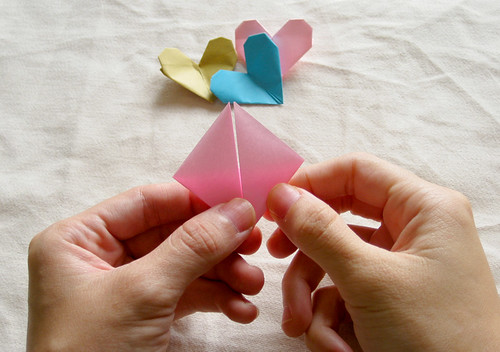
1. Fold a square piece of paper in half diagonally.
01
2. Fold bottom corners of triangle to top point.
02
03
3. Unfold.
04
4. Fold top of triangle to bottom center point.
05
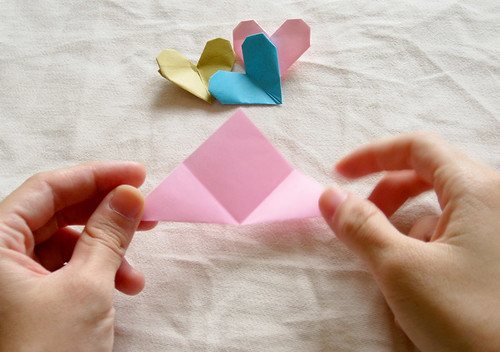
5. Refold the tips of triangle.
06
07
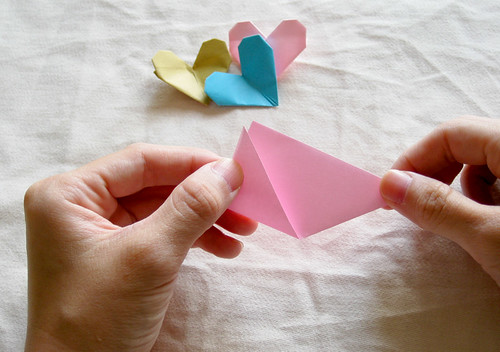
6. Fold top of diamond to side. Repeat on both sides.
08
09
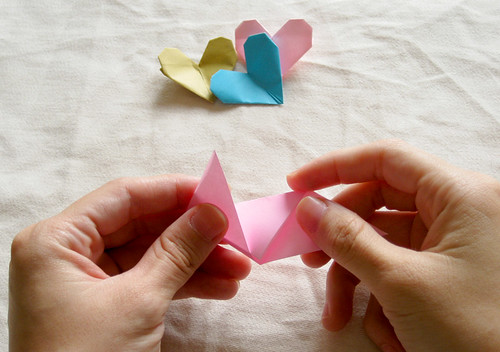
7. Unfold. Open the fold and squash down to form the top part of heart. Use folded lines as a guide.
10
11
12
13
14
8. Repeat on both sides.
15
9. Fold corners in to make a more rounded shape. Repeat on both sides.
16
10. Flip over.
17
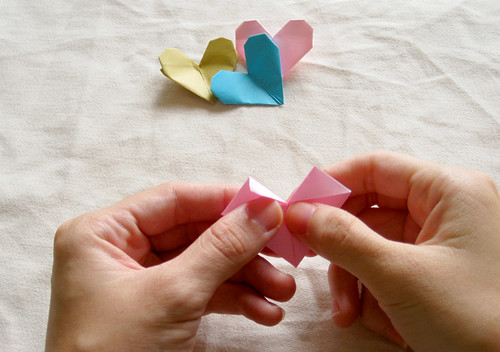
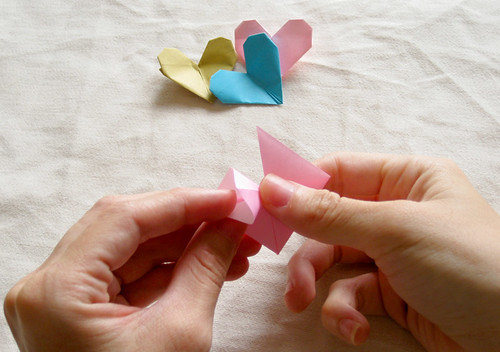
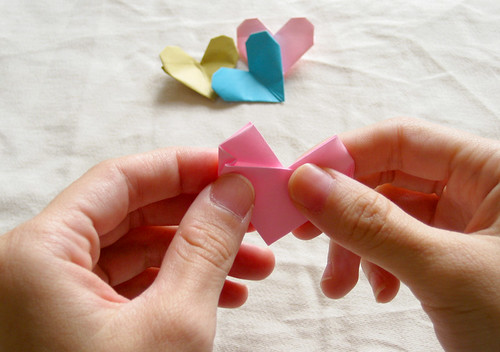
11. Fold the corners into the pocket. Use fold marks as a guide.
18
19
12. Repeat on both sides.
20
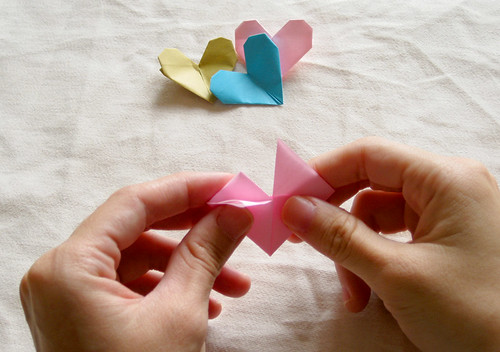
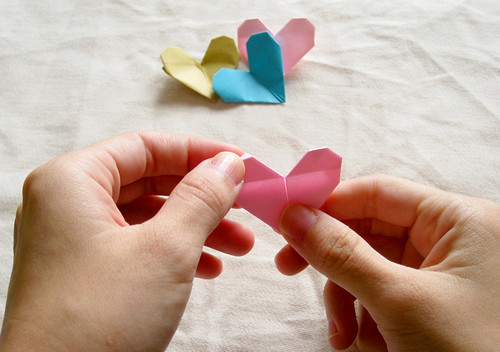
13. Turn over to front. Fold the top of the heart down. Repeat on both sides.
21
22
View from the back:
23
and TA DA!! Finished :}
24
 

Thứ Ba, 18 tháng 10, 2011

Halloween craft: crochet pumpkin


Pattern: Halloween craft, crochet pumpkin

Used stitches:
Slip stitch (ST)
Half double crochet (HDC)
Double crochet (DC)


You need:
Orange yarn
Green or brown yarn
Matching crochet hook
Filling
Stitch marker or safety pin

(I used Rico Creative Cotton and a 4 mm hook) 

Before you start: place your marker in the first stitch of every tour, this will save you loads of trouble (trust me!) 

Pumpkin
In orange
: 


Round 1. Create a ‘magic circle’ or chain 2 and work in the second stitch from the hook. 8 SC in the ring. 
Round 2. *1 SC in the sc of the last round and 2 SC in the next*, repeat till the end of the round (12 SC)
Round 3. *1 SC in the sc of the last round and 2 SC in the next*, repeat till the end of the round (18 SC)
Round 4. *1 SC in the two SCs of the last tour and 2 SCs in the 3rd *, repeat till the end of the round (24 SC)
Round 5. *1 SC in the next 2 SCs of the last tour and 2 SCs in the 3rd*, repeat until end of the round (32 SC)
Round 6. *1 SC in the next 3 SCs of last round and 2 SC in the 4th*, repeat until round (40 SC)
Round 7 and 8. 1 SC in every SC of last tour (40 SC)
Round 9. *1 SC in the next 3 SCs of last tour and SC 4th and 5th together (decrease)*, repeat until the end of the round (32 SC)
Round 10. *1 SC in the next 2 SCs of the last round and SC the 3rd and 4th together (decrease)*, repeat until end of round (24 SC)
Round 11. *1 SC in the next 2 SCs of last tour and SC the 3rd and 4th together*, repeat until the end of the round (18 SC)
Round 12. *1 SC in the first SC and SC the 2nd and 3rd together*, repeat until the end of the tour (12 SC)
Start filling your pumpkin!
Round 13. *1 SC in the first SC and SC the 2nd en 3rd together*, repeat till the end of the round (8 SC)

The pumpkin is now almost closed. Keep decreasing until it’s entirely closed. Finish and leave a long piece of thread at the end. Pull this thread 6 or 8 times through the heart of the pumpkin. Make it nice and tight to create that real pumpking ‘effect’.

If you’d like a bigger pumpkin, just keep increasing after round 6 untill you think your pumpkin is big enough. 

Leaves
With green or brown


Chain 7
SC in the 2nd chain from the hook. Then: 2 SC, 2 DC, 1 HDC and 2 SC. On the other side of the chain you hook: 2 SC, 1 HDC, 2 DC en 2 SC.


Finish one of the two threads on each leaf and use the other thread to attach the leaves to the pumpkin. I made two leaves, but if you’ve made a bigger pumpkin you can of course make more leaves. 


 Aren’t they cute and autumn-y!

Recycling ideas: sheep plush out of mitts and gloves


Recycling ideas: sheep plush out of mitts and gloves
So you’re wondering what to do with an unused faux-wool car wash mitt, an old pair of black fleece mitts, and an old pair of black chenille gloves (you’re not alone,  it’s been a confounding daily ponderable for me, too).  Well, with these items, you can make a new friend.


That’s right, I made this lovable little sheep using the above variety of mitts and gloves.  I picked up the car wash mitt from Dollarama a while back, saving it from a life of grimy slavery.  Perhaps my American readers can rescue a similar mitt from the Dollar Tree.  The advantage of living through blistering cold Canadian winters is I have a stash of old mittens and gloves to append to the car wash mitt.

To recreate this little fellow:
1. Sever the thumb off one of the fleece mitts.
2. On the second fleece mitt, cut along the side opposite the thumb.  Stop once you reach the length equal to where the thumb is joined.
3. On that same mitt, cut the cuff.
4. Sew the thumb on the open side of the second mitt (both turned inside out).  Sew the mitt shut.
5. Cut a slit along the middle of the mitt, the length of the car wash mitt cuff.  Turn right side out.
6. Cut together in one piece the index and middle fingers of the chenille gloves (pairs of legs).  On one of the gloves, sever the thumb (tail).
7. Turn the car wash mitt inside out.  Rip small openings in the seams for the legs and the tail.
8. Fill the legs and tail with the remaining unused fingers of the gloves.  Feed through the designated openings and sew onto the open seams of the car mitt.
9. Turn the car wash mitt right side out.  Fill with your choice of material.  I suggest the leftover pieces of mitts and scraps of an old sweater.
10.  Fill the head.  Wrap the opening around the cuff and sew together.  Add eyes.  My own eyes were set on the big googlies.
I know I won’t miss the mitts and gloves, now that I have something else to love.


Thứ Hai, 17 tháng 10, 2011

Crafty jewelry: embroidered hair accessories, more ideas

           Crafty jewelry:  embroidered hair accessories, more ideas 
Crafty jewelry:  embroidered hair accessories, more ideas


fg070-3.jpg   Crafty jewelry:  embroidered hair accessories, more ideasfg080-1.jpgfg075-2.jpg


 fg076-2.jpgfg076-1.jpg


  fg080-2.jpgfg080-3.jpgfg080-4.jpg


 fg078-1.jpgfg078-2.jpgfg078-3.jpgfg078-4.jpg

fg075-4.jpgfg075-3.jpgfg075-5.jpgfg075-1.jpg 

 fg071-1.jpg


   fg070-1.jpgfg070-2.jpgfg070-4.jpgfg070-5.jpg

 fg067-3.jpgfg067-2.jpgfg067-1.jpg

 fg066-3.jpgfg066-1.jpgfg066-2.jpg

 fg077-1.jpgfg077-3.jpgfg077-7.jpgfg077-4.jpgfg077-6.jpgfg077-5.jpgfg077-2.jpg

Labels

Accessories afghan Amigurumi amirugumi Art Ẩm thực baby crochet baby knitting Baby learn bag Bags balloons Bé học toán Bé tập vẽ Bé tô màu Bead belts books booties bows boxes bracelet bratara cake candles candy Cards carving carving fruit carving fruits Cắm hoa Cắt may cercei Chơi mà học clay colier coloring Coloring - Tô màu crafts crochet crochet pattern cross stitch Curtain cutting paper Doll Dolls drawing dress Đan Đan len earring Easy dot Embroidery Embroidery - Thêu fashion Felt Floral arrangements - Cắm và bó hoa flower arrangement flowers crochet Folding paper Folding towels food food decor Funny garden Gấp giấy Gấp hộp Giầy - Dép gift Gifts glass gloves Hair hair clip hat hats Họa sĩ nhí holiday craft holiday crafts home and garden inel jewelery jewelry Kết hạt Khăn - Mũ kirigami knitting knitting pattern knot Lam do choi Làm đẹp Làm đồ chơi Làm hoa vải Làm thiệp macrame Magazine make up making flower making flowers Making flowers - Làm hoa Making toys Mẫu móc mittens Móc nail Nail art necklace necklaces Nến trang trí Nhà đẹp or Origami Origrami painting pandantiv Paper Patchwork Phim pictures pillow Pillows plastic Play and learn for baby poncho Quilling paper Quilt recycle recycling repair work ribbon ring rings rugs Sách tiếng anh cho bé scarves sewing shawls shoes and sandals skirt skirts slippers soap socks soutache sweater tablecloths Tatting Tết dây Thêu Thiệp Trang điểm Trang trí Túi xinh Tutorial Tutorial video underwear Valentine's day Video video tutorial weaving wedding wood